 TM
TM
Copyright 2003. All rights reserved.
|
Using a BBQ Grill and a Little Ingenuity for Roasting Coffee.
February 2003
In 2002, I built the One Pound BBQ Grill roaster . That roaster was a wonderful step up from the 3 ounce batch size of the store-bought Hearthware Precision air roaster I've used for several years. To roast enough for my family, I had to roast about two pounds of coffee a week. Divide that by three ounces, and it was a time consuming task. Many times, it was enjoyable and I could experiment with different roasts and blends with each tiny batch. Other times, when life was a bit more complicated and time was at a premium, spending hours roasting beans was not much more than a chore. The one pound BBQ grill roaster was a wonderful step up and saved so much time. A pleasant side effect was that the drum roasted beans seemed far superior to those roasted in the air roaster. More complexity and body. Not one to be satisfied easily, I decided to build a bigger and better drum roaster. One I could possibly roast, not only beans for myself, but beans for family, friends and co-workers. As first suggested by Doug Cadmus , I decided to use the larger of a pair of stainless steel perforated Frontgate waste cans as a drum for my mega-home coffee roaster. (Note: Frontgate does not carry the drums anymore. Lowe's has a very similar one for $15) Using this can as the basis for the design, it was extremely easy to build with basic tools and a few inexpensive parts. The toughest thing was cutting the 20 gauge stainless sheet to make the stirring vanes and the much thicker brace inside the drum. I bought a 30 RPM salvaged 'paint stirrer' motor from Dan Bollinger, a frequent poster to alt.coffee and Sweetmaria's Homeroast list . For the drum, I used a piece of hardware from another grill attachment used for rotisserie cooking large roasts. The piece was perfect for riveting to the bottom of the stainless drum to hold it onto the 'spit' rod. For the other end of the drum, I bought a common stainless steel mixing bowl (OK, I bought a whole set of bowls for $9.99 at 'Bed, Bath and Beyond'). I drilled a 3 inch hole in the stainless bowl, using a titanium hole saw. An easy cut. Not nearly as difficult as I expected. I smoothed the edges and I used stainless pop rivets to assemble everything. Easy and strong connectors. A great alternative to welding, which I don't know how to do. I also pop riveted a stainless steel strut inside the drum to stabilize it on the 'spit' rod. With the drum assembled, I mounted the motor and tried my first batch. Loaded five pounds into the cold roaster as a test, and hit the switch. Nothing. The motor was not nearly strong enough to turn the drum loaded with a five pound load. I reduced the beans to two pounds and it finally struggled without stopping as it rhythmically turned the drum. Deward on the Homeroast list suggested I buy a gearmotor from a surplus place he'd used before. I put in a phone order and had the motor in a week. Gawd. It had a 5/8" shaft and looked like it could be a winch on the front of a monster truck. Perfect! Swapped a jar of my homeroast at a local auto electric repair shop for a shaft coupler that works like a charm. Bought all the conduit and switch stuff, connected it all up and it purred like a kitten. Smooth. OK, after a 30 minute, full heat burn-in, I tested it on my first three pound roast. I didn't have the nerve to possibly waste a whole five pound batch in case something went wrong on the maiden roast. Roaster worked perfectly. Operator error was responsible for a roast that was pulled slightly prematurely due to seeing so much smoke. Being used to roasting much smaller batches, I was not expecting smoke at the end of first crack. Since it is difficult to see the beans as they roast in a BBQ roaster, I quickly came to the conclusion that I had gone straight from first to second crack, and I was headed toward combustion. I pulled the lid up on the roaster, lost most of the built-iup heat, and then noticed the beans were still fairly light. Dang! I dropped the grill lid and cranked the burners to full blast. I watched the heat drop, drop, drop, then slowly turn around and begin climbing. The smoke began billowing out once again, and I again made the wrong decision to stop the roast. I turned off the burners, popped open the grill and grabbed the wooden handle and the end of the drum with my leather work gloves. Dumped the beans into my super-efficient cooling bin and stirred for about two minutes until the beans were cool enough to touch. Beans were at a 'city' roast level, and were really sweet in the cup, but had a hint of sourness as the coffee cooled. A minute more and they would have been perfect. Subsequent roasts have been incredible. Five pound roasts are a snap. Getting smoke out of my garage is now achieved by an exhaust fan mounted above the whole grill. Using the grill insie my detached garage has it's hazards. Carbon Monoxide being the greatest. I use a carbon monoxide detector to monitor levels as I roast, and I always keep the door open a bit. with the door closed, the levels climb fairly quickly and I would caution anyone from doing that. With the door open slightly, the readings on the CO detector are near zero. As the spring and summer heat arrives, I'll have to find a way to move the roaster outside and still protect the motor. Maybe I'll keep it inside and roll it outside for roasting.
Here's a list of parts and tools I used for the project.
___Large Frontgate perforated stainless steel waste can, 9 3/4" diameter. ___Four 1 1/2" stirring vanes pop riveted inside the drum. Two of the vanes are tapered to keep the roasting beans from stratifying into similar sizes. ___One 9 5/8" standard stainless kitchen mixing bowl with a 3" hole cut into the bottom. ___One 1/16" thick strut, custom fit, inside the drum to mount it to the 'spit' rod. ___One 30RPM motor strong enough to turn a 10 pound load. A regular rotisserie motor usually turns at 3 to 6 RPM. Some thing that's too slow. ___One 'spit' rod and assorted rotisserie hardware. Look at the pictures to determine the configuration right for you. ___An aggressive bean cooler. Five pounds of beans is not easy to cool. Most roasters say that the beans need to be fairly cool within four minutes. The quicker, the better. ___Heat diffusion tiles (see the white 4"x4" squares?) to keep the direct flame from hitting the drum. ___Accurate thermometer (not the one on your grill) inserted somewhere near the bean mass. ___Heat resistant gloves. I use standard leather work gloves, but I've been eyeballing a nice pair of welders gloves. ___A canning jar funnel, to get the beans into the drum. ___A timer of some sort so you can time the roasts for consistency.
That's all!
|
(Click the pictures to enlarge) 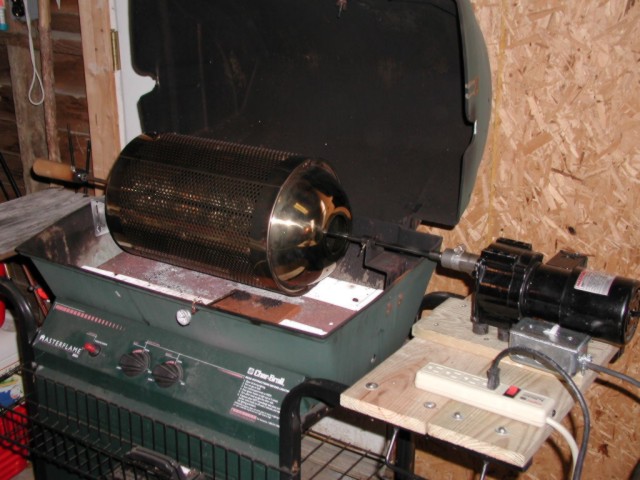 Here's how the complete BBQ grill roaster looks. It's starting to look less and less like a BBQ grill. 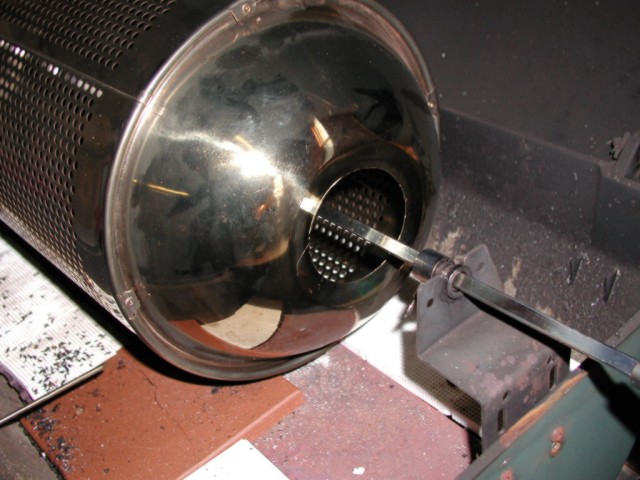 Take a look at the way the bowl connects to the drum using pop rivets. Also note the standard rotisserie hardware used to support the spit rod and drum. The bowl on the end of the drum has a 3" hole cut into it so the beans can be put in and removed without having to fiddle with a latched closure. The bottom left of the picture shows the tip of the thermometer, shielded from direct heat by the solid terra cotta tile. 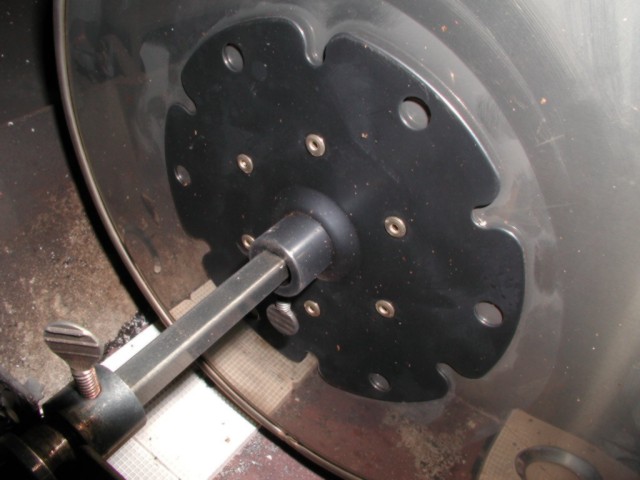 I'm always looking for things that might work on a coffee roaster. I found this flange along with a bunch of grill accessories at a local outdoor store where I buy my swimming pool supplies. I saved the label, but quickly lost it, so I have no idea who makes it or where you can get it (except for the store in Clarksville, Indiana where I bought mine). I easily pop riveted it onto the bottom of the drum. Hardest part was finding the exact center and positioning the flange with precision while marking the holes that needed to be drilled to mount it. 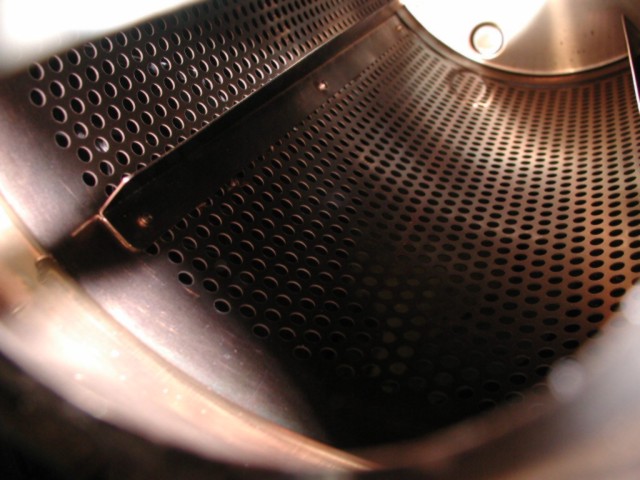 I hand made four 1 1/4" stirring vanes that are pop riveted inside the length of the drum. Some sort of stirring mechanism is necessary for evenly roasting the coffee. There was convincing discussion on the Homeroast list about the beans 'stratifying' into layers as they tumble. Knowing that I 'definitely' didn't want stratified beans 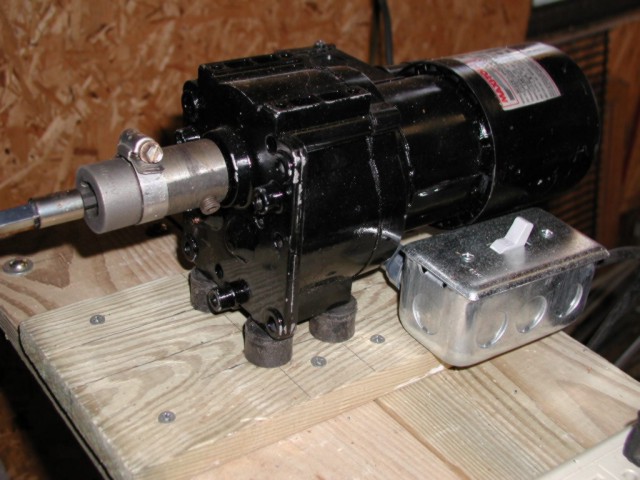 This is the powerhouse that turns the drum is a 30 RPM gearmotor with a 5/8" shaft. Note the coupling, the electric switch and the rubber mounting bushings to help isolate the vibration and keep the motor quiet. 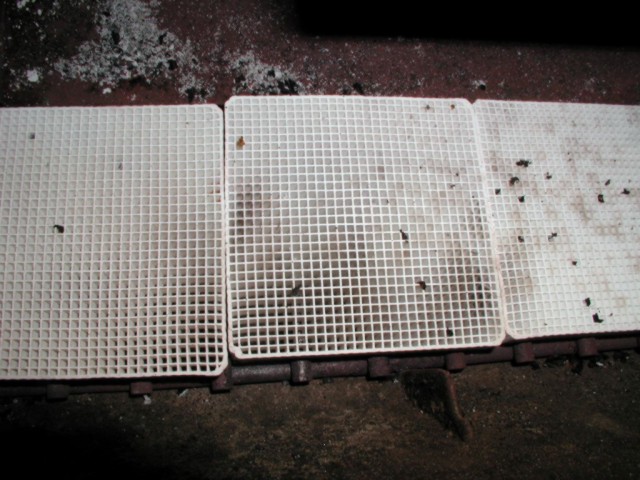 The drum and beans need to be shielded from direct flame. These 4"x4" perforated ceramic tiles are perfect. I bought them at a local home supply store for $12 a set. 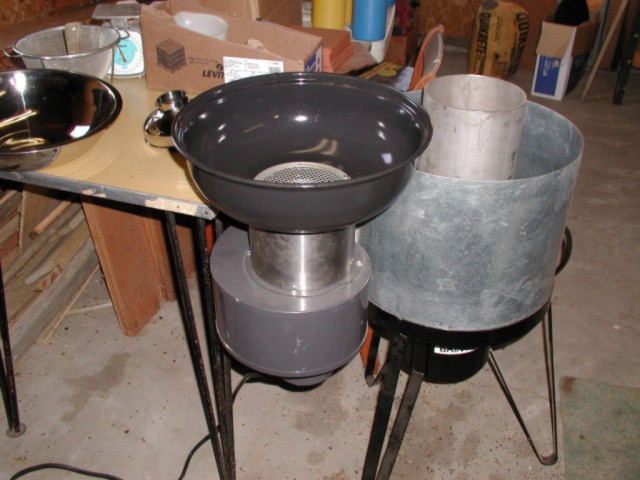 I've got this 2 pound fluid air roaster about half way completed. Until it's done, the cooling part of the design works perfectly for cooling drum roasted beans. Beans are cool to the touch in two minutes. 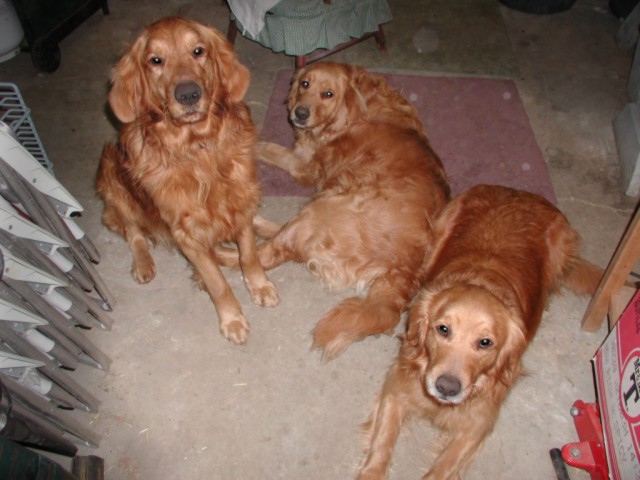 From left: Boomer, Sweetie, and Honey. My roasting companions. Yes, they eat the roasted beans that fall on the floor, and no, it doesn't make them sick or kill them.  This was just such a great picture, I had to include it. That's Boomer, sitting in the roaster seat. My stud dog. He's sired quite a few Golden Retriever puppies over the last few years. What a guy! |
|
The Homeroasterآ is dedicated to helping the coffee homeroaster explore, find, acquire, roast and brew coffee to achieve the ultimate coffee experience. If you have suggestions for articles or information concerning homeroasting, please send them to me. Great things are coming in the near future for homeroasting, and I am excited about the possibilities! Please check back soon for great homeroasting information and opportunities for coffee homeroasters!
Ed Needham |
|
Quote of the day..."Drinking ISH that I paid $22.50 a pound for, roasted in a HotTop
that I paid too much for, brewed in a Solis Master that I paid too much for - but it sure does taste good!" John Abbott, Sweetmaria's Homeroast List |
 Back to the Main Menu
