 TM
TM
Copyright 2002. All rights reserved.
|
Great coffee...on your grill.
July 2002
Have you ever wanted to roast your own coffee at home, but you thought it would cost an arm and a leg to buy a roaster? This plan uses a BBQ grill and parts you can find at your local used restaurant supply and hardware store. Of course, all the parts could be fabricated individually and might be just a bit prettier or a little more functional, but for under $50 you can be roasting perfect beans like a pro. I chose to make mine out of all stainless steel. That might be overkill and unnecessary, but that's the way I wanted it. You may find parts made of aluminum that would work just fine. Aluminum is 'much' easier to work, and does not require special tools such as a bigger, sturdier pop riveter and premium drill bits. Here's the parts list...
|
(Click the pictures to enlarge) 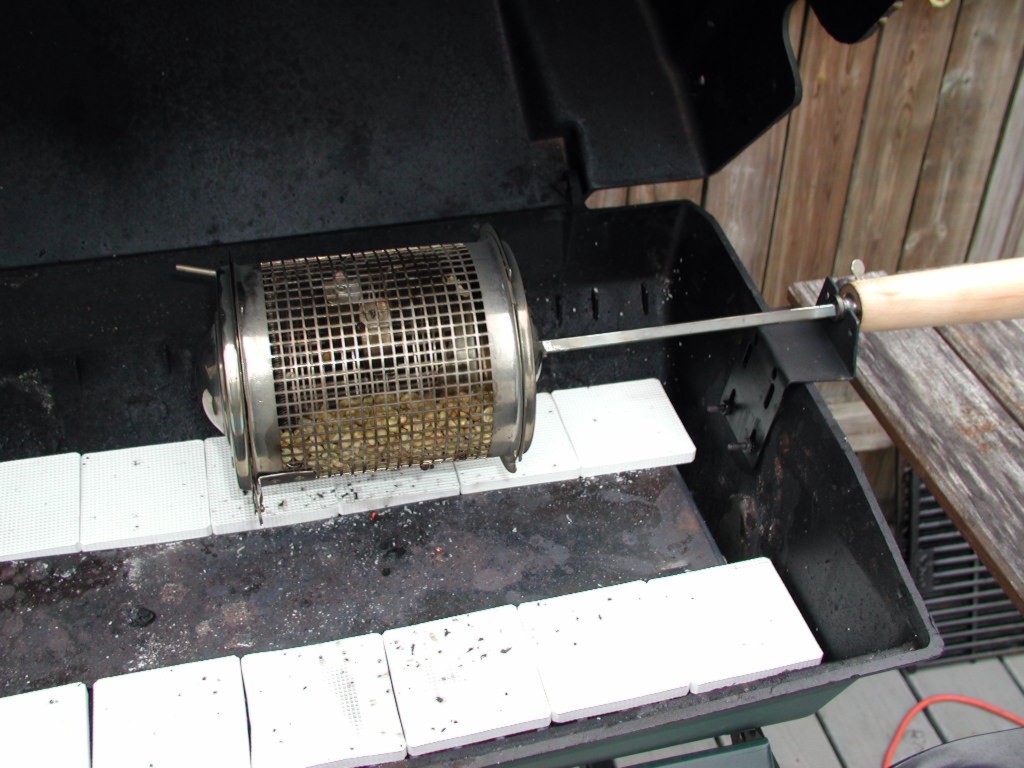 Here's how it looks on the grill. I purchased a set of perforated ceramic tiles (see the white square tiles?) to lay inside the grill to evenly dissipate the heat. They work extremely well, and the only hassle is that I have to remove them if I use the grill for food. I really don't want to get them all gunked up with grease. 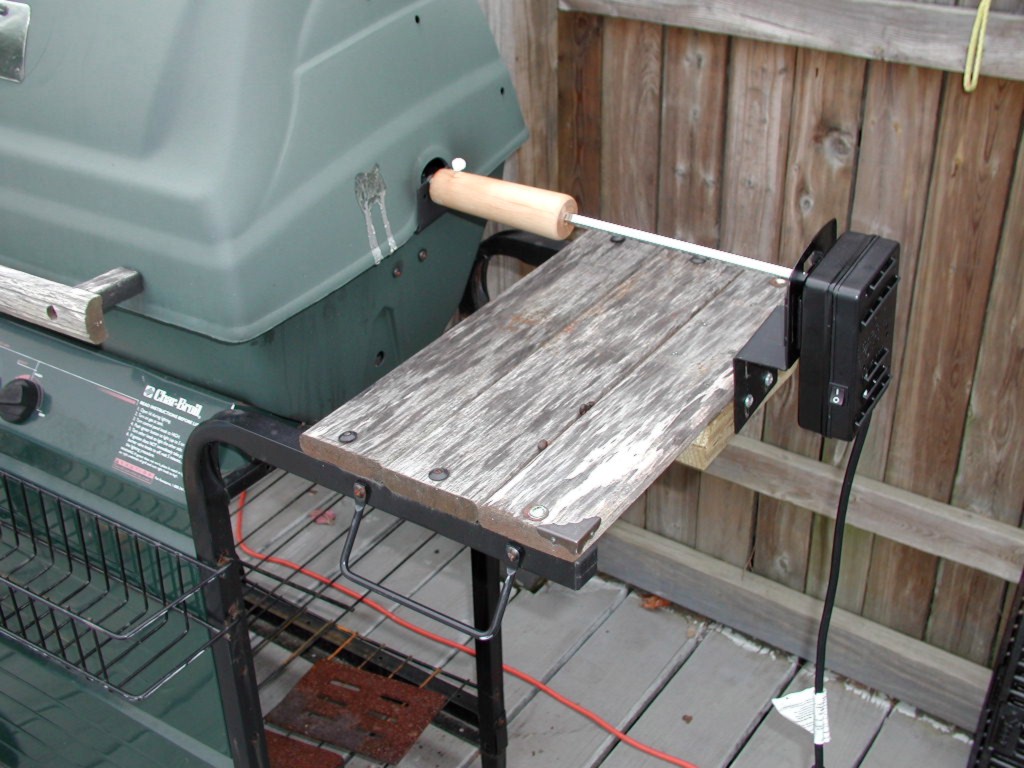 Installed a bit different than a typical rotisserie. It's mounted to the shelf, on the side. 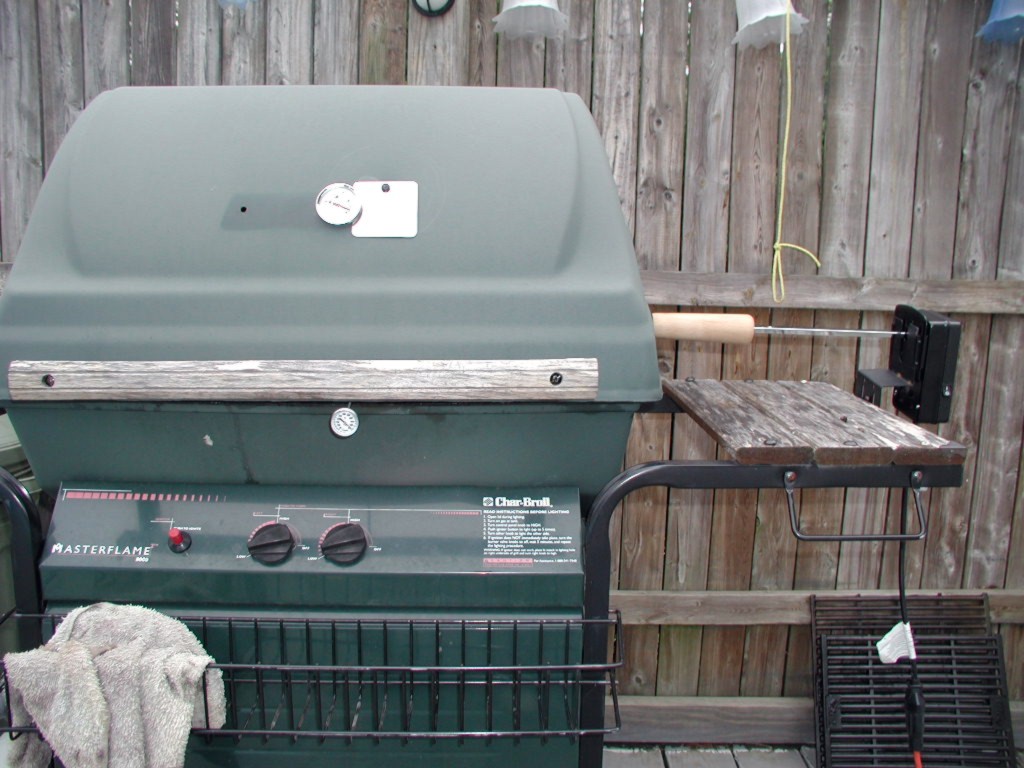 Here's the way it looks while it is roasting. The rotisserie motor is quiet enough to easily hear the cracks and the port allows visibility of the beans in the drum with a small penlight flashlight.  I removed the 'Char-Broil plate from the top of the grill and installed a new, more accurate thermometer and a plate to cover the hole and keep rain out when not in use. 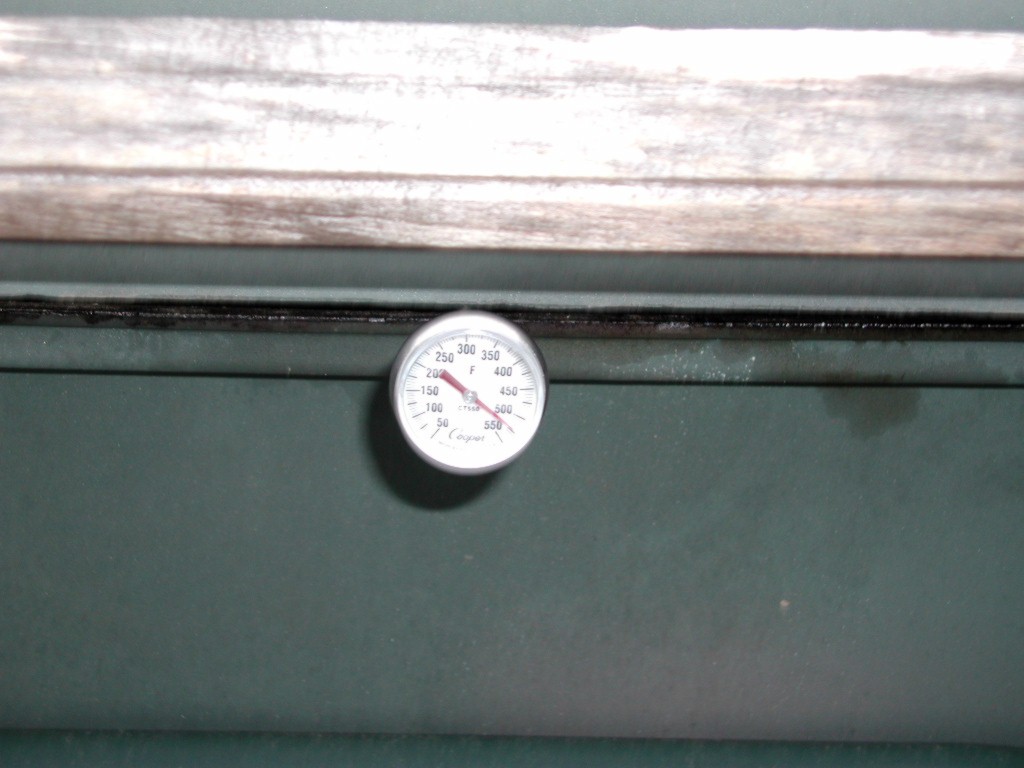 I quickly discovered that the top mounted temperature gauge was not giving me accurate roasting drum temperatures. When I did my initial trial roasts, the first two were great. The second two, after installing the thermometer and trying to keep it at 500F, severely ruined my roasts. How do you say baked, underroasted beans in about 25 minutes. Evidently (duh!), the temperatures at the top of the grill are significantly hotter than those near the bottom, where the beans actually roast. I inserted a small 'Cooper 550' restaurant thermometer at the crack where the top and bottom of the grill body meet, and found a 200F difference! Subsequent roasts pegged the top thermometer at 700F and the bottom one at 500F to 550F. Roasts are now the best I've ever done--ever. 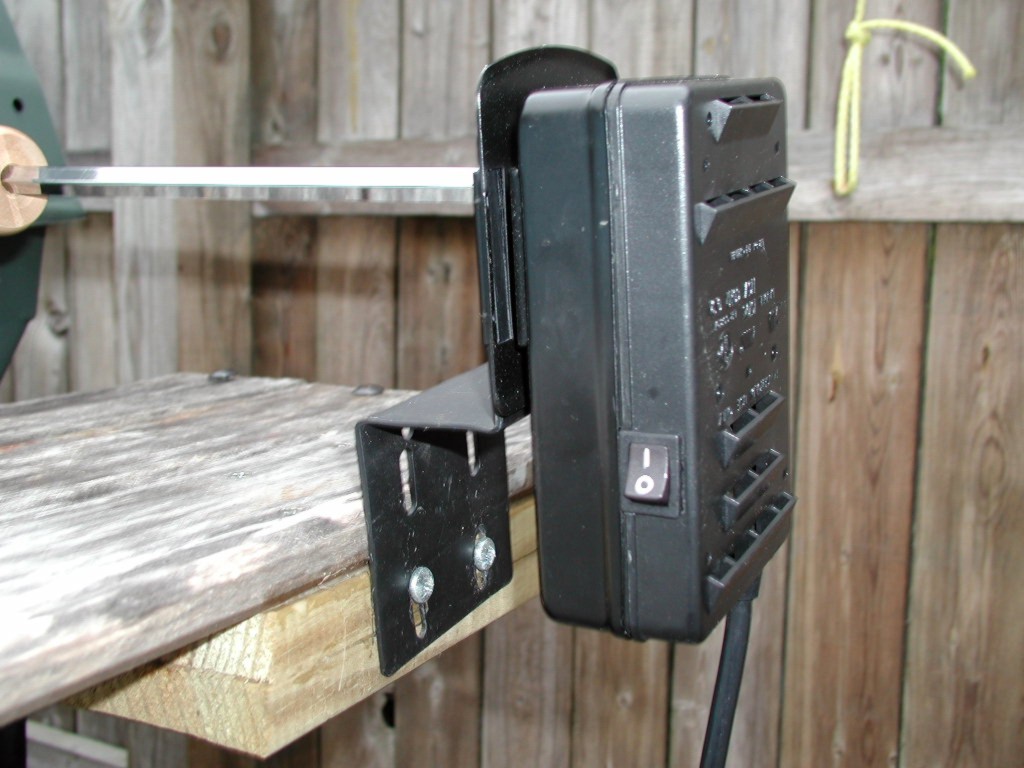 I added two 1x6 treated boards to the bottom of the grill shelf for added stability. I'm not sure this is a necessary step, but I did it anyway. 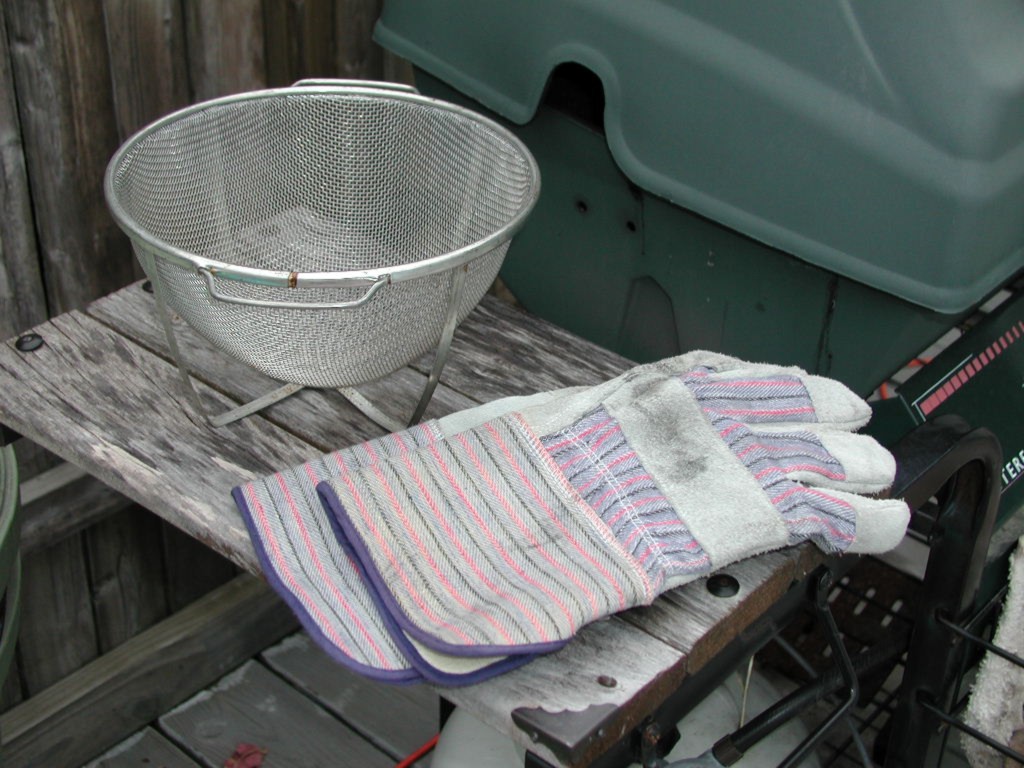 I find it necessary to use gloves to handle the wooden handle and to unlatch the drum clasp to dump the beans into a stainless steel mesh collander. Please be careful. The hot, stainless perforated drum would leave a nice tattoo if you became complacent. It doesn't 'look' hot. 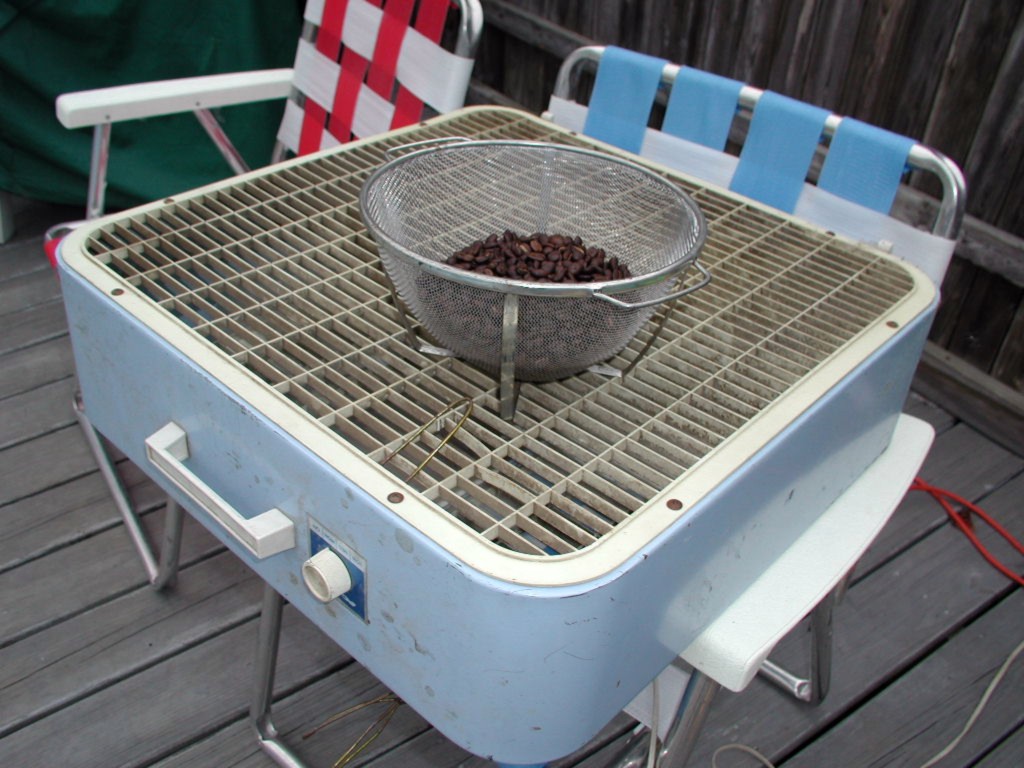 This part is not too glamorous, and the fan is downright dirty, but it's my garage fan, and it works. Maybe I'll spring for a new fan so...naaaaaah. 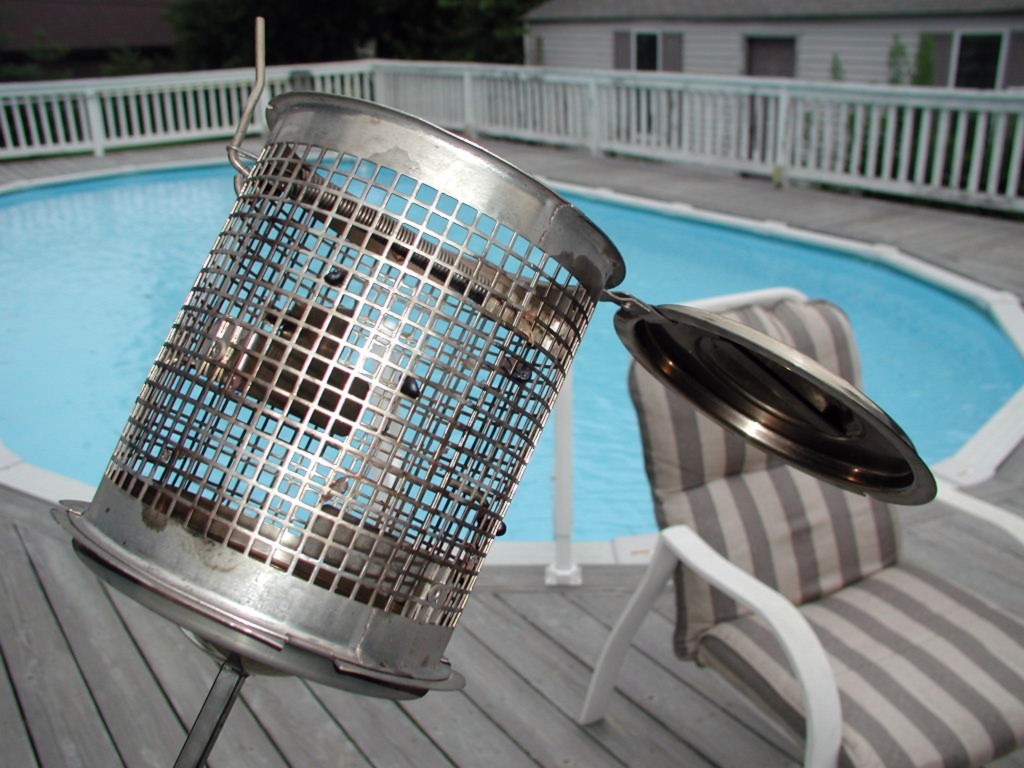 The only problem with my BBQ grill roaster is that the drum perforations are just a tiny bit too big, and allow a few beans to get stuck each time I roast. Mine are 3/16" square (5mm), and roasting smaller size or peaberry beans are out of the question. My second generation BBQ grill roaster will have holes no bigger than 5/32", or about 4mm. 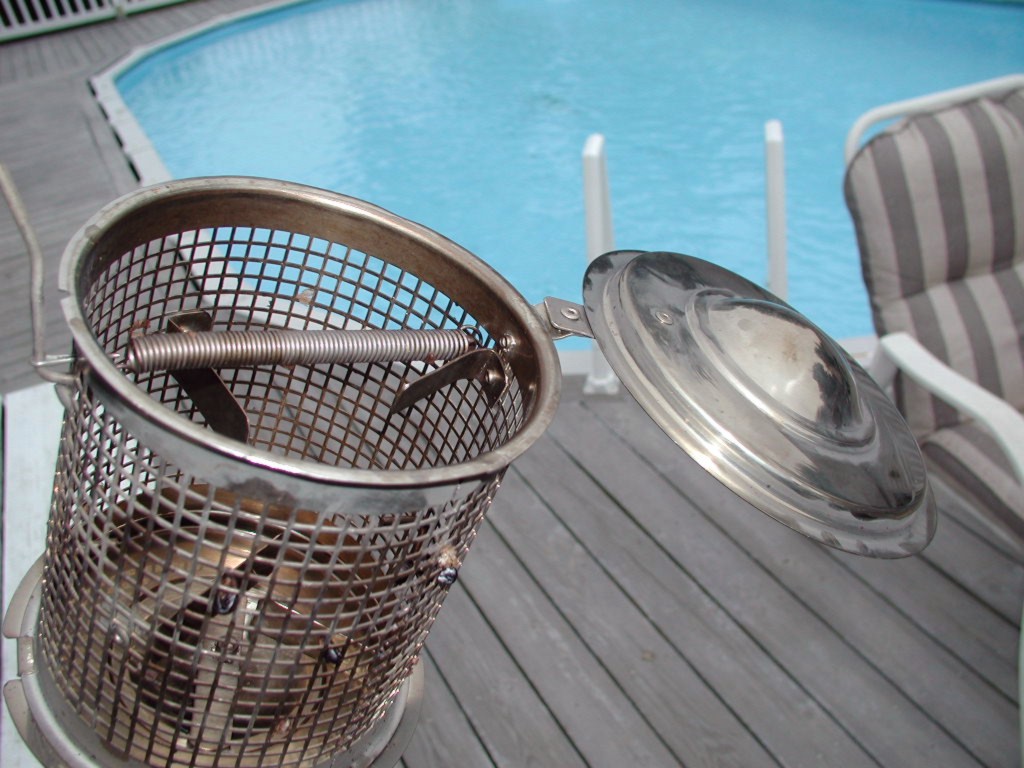 I did not want the rotisserie rod to go through the roaster. I wanted one end to open freely, without being obstructed by the rod. My solution to this was to cut the rod and thread a hole in the end to attach to the other end of the roasting drum. with this design, I was able to have one end freely open without obstruction. I fabricated a simple hinge from 3/4" wide, 20 gauge stainless sheet and a few stainless steel pop rivets. You can design a hinge any way you wish, but this works really well. The end cap slides out of the way rather than hinges out. Easy to construct with a drill, tin snips and a stainless steel pop riveter. (Note: Stainless pop rivets may not work with some of the less rugged riveting tools. The one I have cost $50, but they have a million uses around a workshop.) 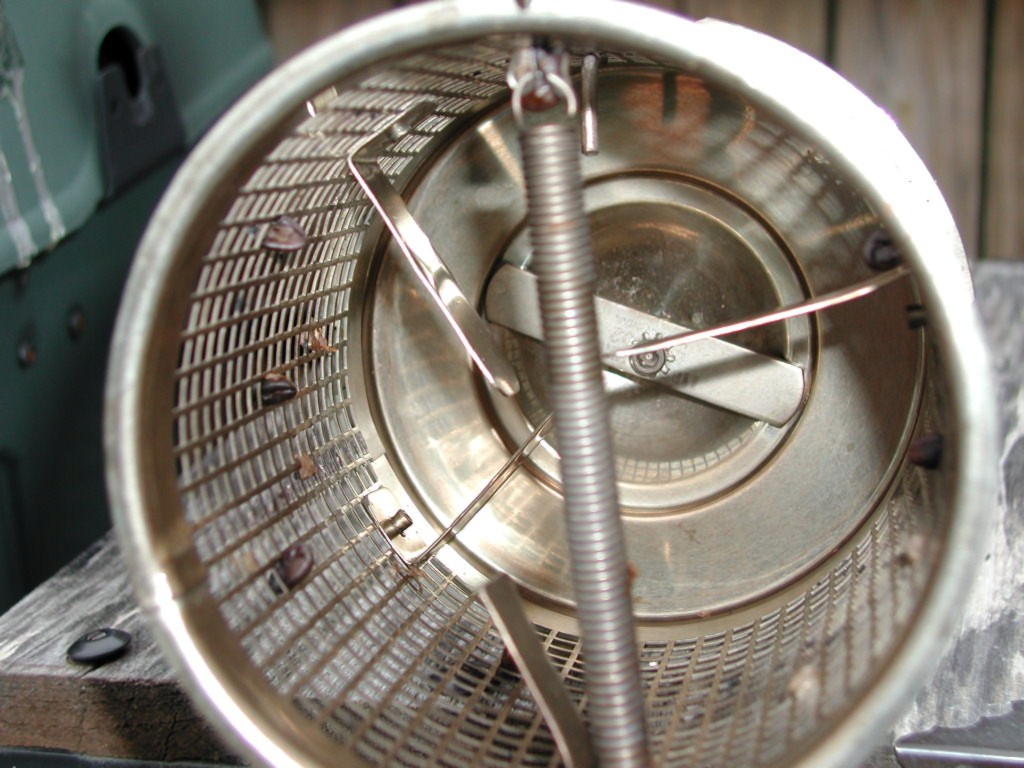 I pop riveted four 3/4" wide stainless steel 'stirrers' inside the drum to agitate the beans. I staggered them so all the beans move around. The big spring across the front is connected to the latch, and although not really an elegant soloution, it works well to hold the latch in place. The latch must be constructed so it can quickly and easily be released while handling the very hot drum full of smoking beans, and wearing thick heat resistant gloves. 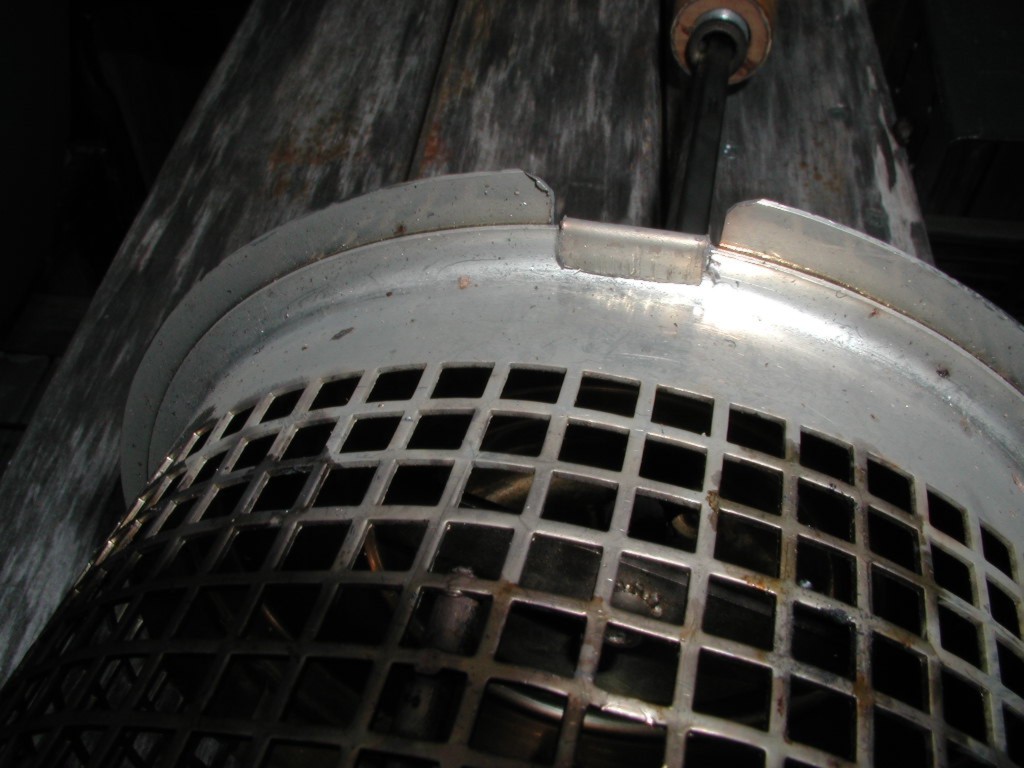 I used a Dremel tool with a cutoff wheel to make the small cuts in the stainless steel 'lid', so it can attach to the drum. Two cuts, round off the sharp edges and bend down the tabs. Four of these hold the lid on the drum securely. 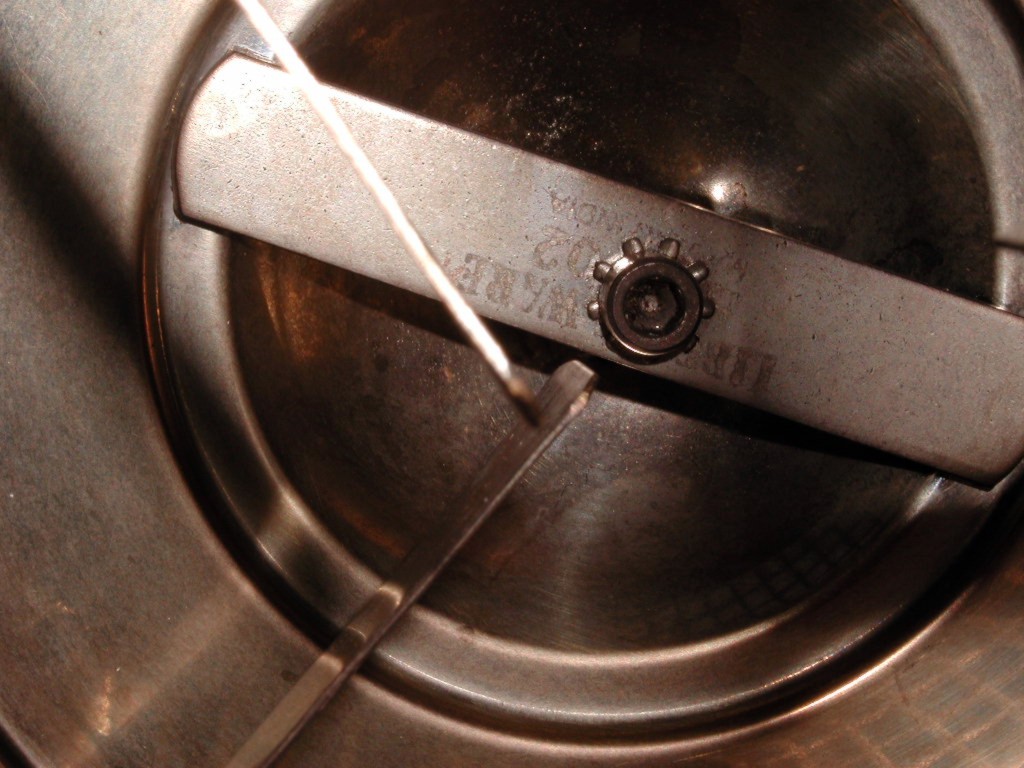 Before attaching the lid to the drum, I drilled the stainless steel handle part of the lid using a 3/16" drill bit. This material was extremely difficult to penetrate, and I actually broke several drill bits in the process. I really need a drill press. 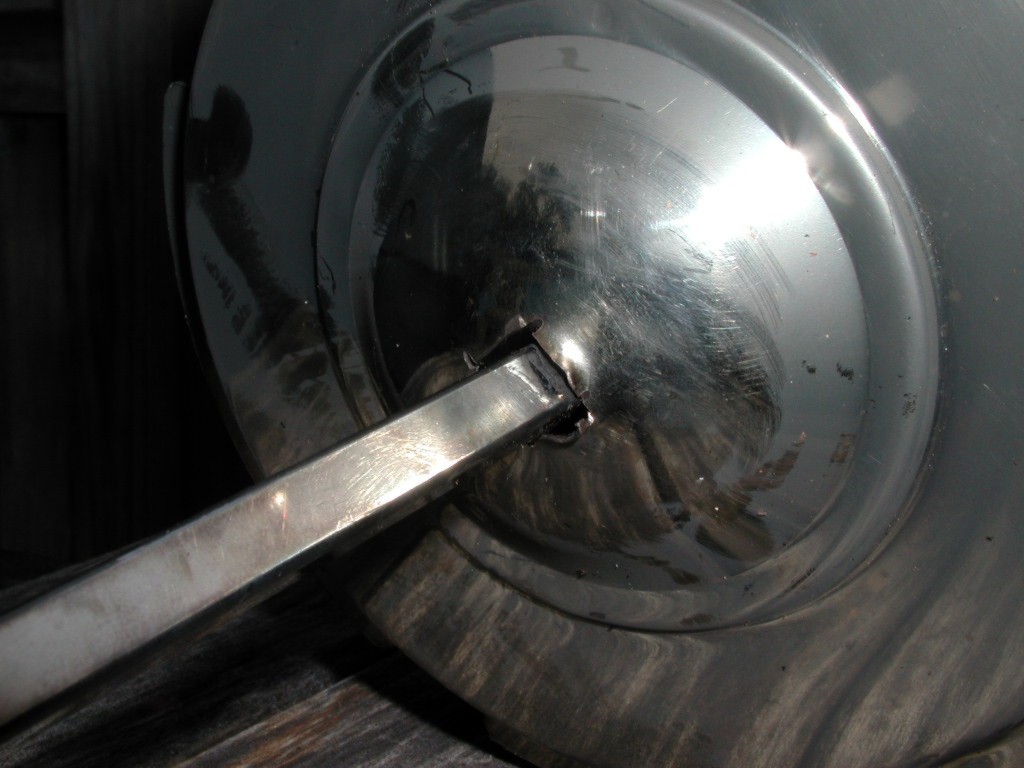 I used the Dremel again to cut the squalre hole in the other side of the lid, so the rotisserie rod could poke through and be bolted on. 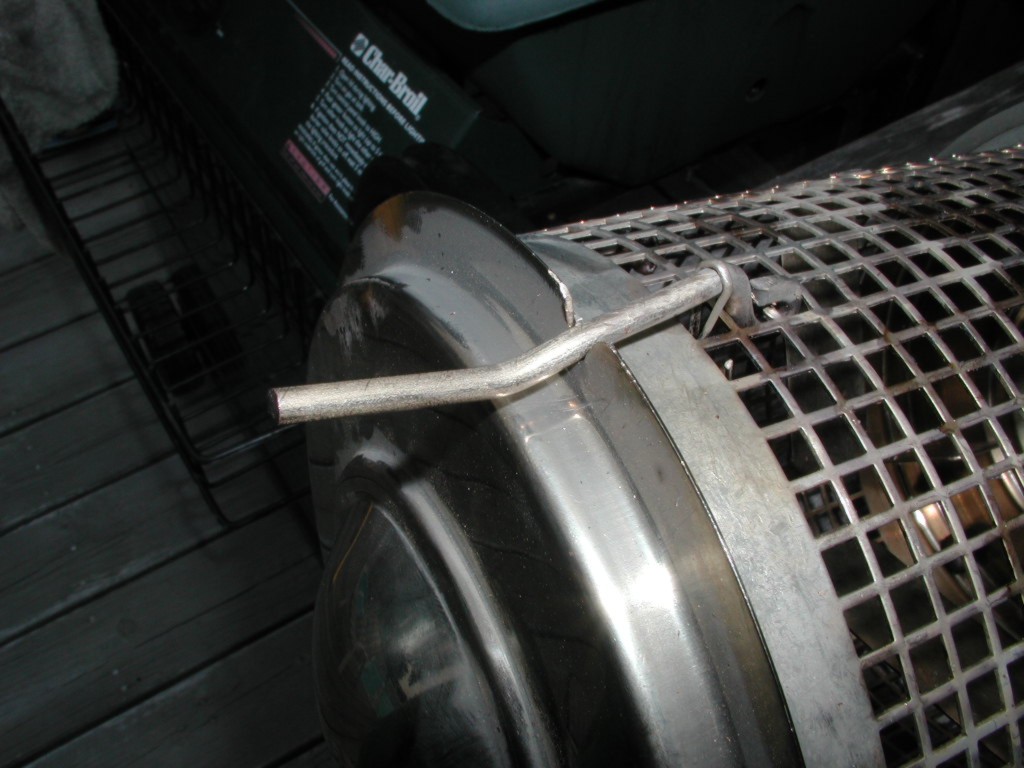 The latch was constructed from 1/8" dia. stainless steel wire, and bent so it fits into two notches cut into both the drum and the sliding lid. A stainless steel spring, shown in other pictures, securely holds the latch in place, and keeps the lid from sliding or pulling away from the drum while roasting. To open, the latch is raised and the lid is rotated to the side. Works really well, and easy to open when hot. 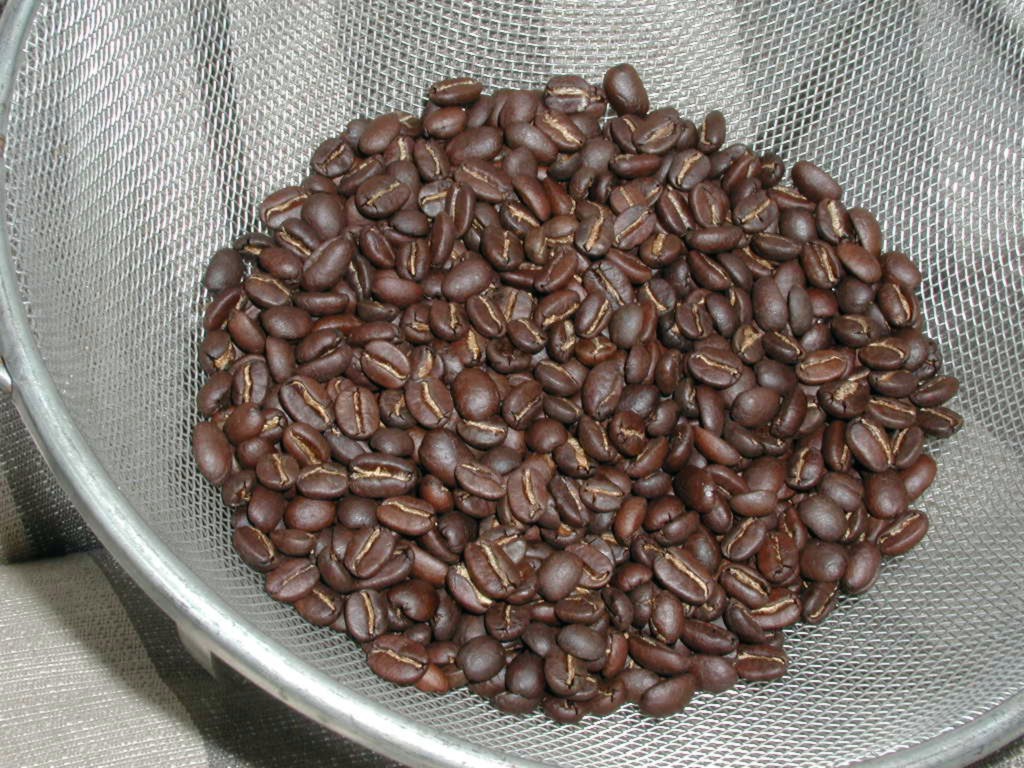 Here's one of the half pound roasts I completed today, as I took pictures and watched the temps. This is a blend of Bali Shinzan and St. Helena. I am confident it will handle full one pound roasts, but half pound roasts work well for my personal use. |
|
The Homeroaster™ is dedicated to helping the coffee homeroaster explore, find, acquire, roast and brew coffee to achieve the ultimate coffee experience. If you have suggestions for articles or information concerning homeroasting, please send them to me. Great things are coming in the near future for homeroasting, and I am excited about the possibilities! Please check back soon for great homeroasting information and opportunities for coffee homeroasters!
Ed Needham |
|
Quote of the day..."Money can't buy happiness, but poverty won't buy anything" Ed Needham 2002 |
 Back to the Main Menu
